
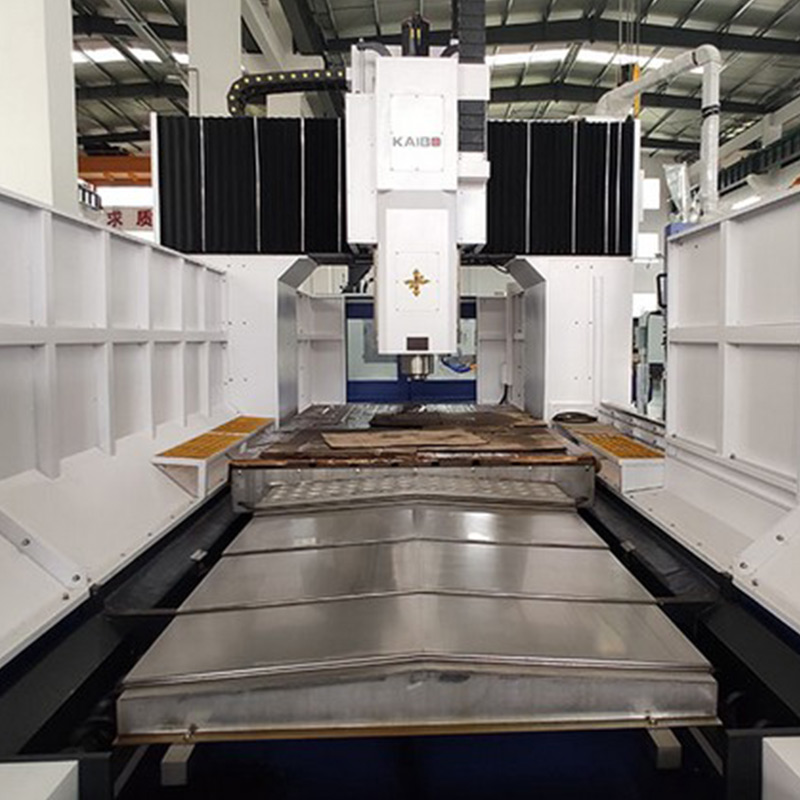
You’re seeking a reliable entry into small-batch metal fabrication at home or in a compact workshop. The Kaibo CNC DC6040A is designed to deliver precise, repeatable results with a user-friendly workflow suitable for hobbyists and light-duty shop use. This guide walks you through practical, safety-focused steps—from power-on to routine maintenance—so you can start machining confidently, improve accuracy, and extend the life of your machine. It also emphasizes the core attributes that make DC6040A a solid foundation for home manufacturing: a compact 600×400 mm work area, servo/belt or ball-screw drive, solid spindle performance, and a straightforward path to learning CNC operations.
If you’re exploring options for a “home CNC milling machine” or a “DC6040A CNC milling machine,” consider the value of a solution that balances safety, ease of use, and upgrade potential. This guide uses practical, actionable steps you can apply right away, with terminology aligned to common buyer questions and the expectations of engineers and hobbyists alike.
Keywords to keep in view during your journey: home CNC milling machine, DC6040A CNC milling machine, CNC milling operation guide, CNC milling maintenance, CNC milling safety, small metal milling machine, CNC milling tool replacement, servo motor milling machine, ball screw milling machine, CNC milling machine fault diagnosis.
Note: This article focuses on practical, real-world steps and safety culture. It’s written for you, the operator, to feel confident while advancing your skills on the Kaibo CNC DC6040A.
Your first habit is to create a clean, organized work zone. Clear the bench of loose tools, secure the workpiece with appropriate clamps, and confirm the DC6040A’s ground connection. Check that the spindle is free of debris and that the tool holders are clean and fully seated. Verify that the power supply matches the machine’s requirements and that the emergency stop functions correctly. For home and small-shop use, a dedicated dust extraction or containment system helps maintain visibility and protects bearings from chips and dust.
Safety comes first. Wear safety glasses, hearing protection if needed, and proper footwear. Ensure the workpiece is firmly clamped before any motion, and never stand in the path of a moving axis. Keep hands clear of the work zone during motor engagement and avoid distractions during tool changes. The DC6040A’s operation guide emphasizes predictable acceleration, controlled feed rates, and conscious avoidance of rapid, abrupt movements that could unsettle the workpiece or cause tool wear.
You’ll typically prepare a G-code file for metal cutting and load it via USB, SD, or a connected PC. Start with a basic test program that performs a simple rectangular pocket to verify dimension accuracy and axis squareness. Set the machine’s origin (home) using a work coordinate system (WCS) you understand, then establish work offsets as needed for different setups. Calibrate the tool length offset (TLO) to ensure machining depth remains within the intended tolerance. If your workflow includes multiple tools, create a clear tool offset table and verify offsets before each run to prevent crashes or unexpected depths.
For beginners, begin with conservative spindle speeds and feed rates. Incrementally increase them as you gain confidence in chip load and surface finish. The DC6040A responds well to steady, predictable motion rather than aggressive bursts; this supports better surface quality and tool life, particularly when machining harder metals or thicker stock.
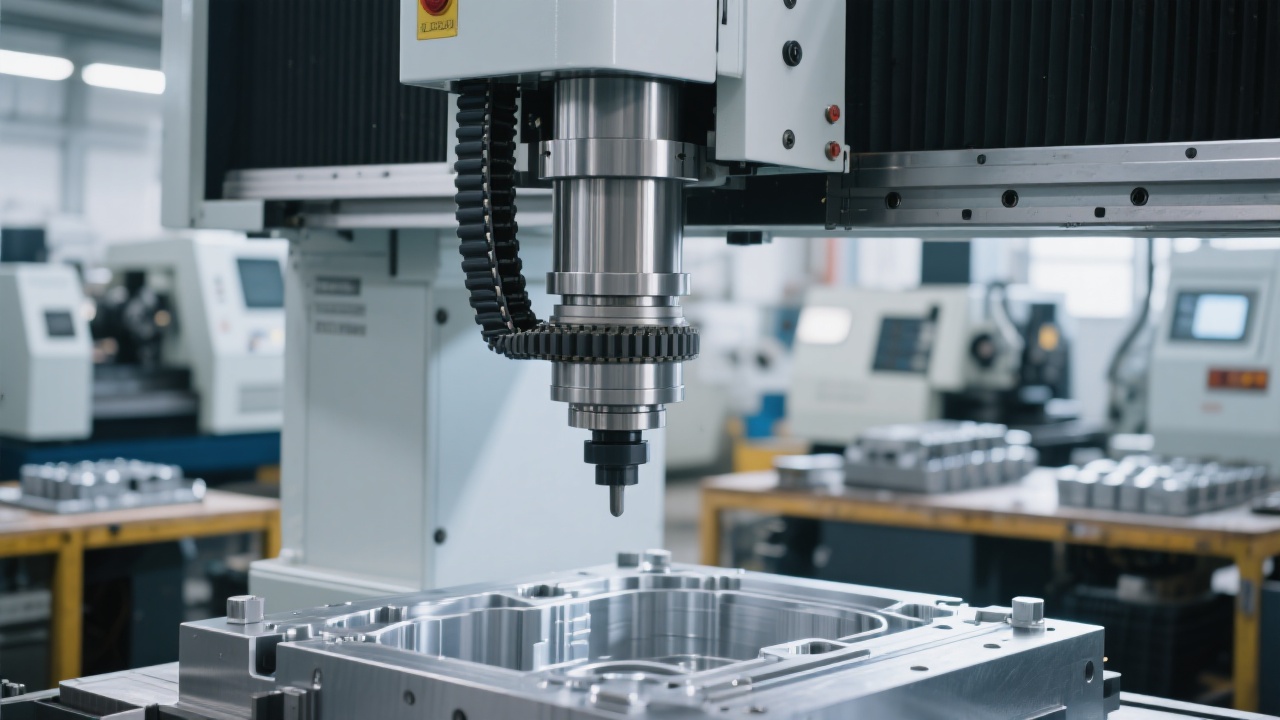
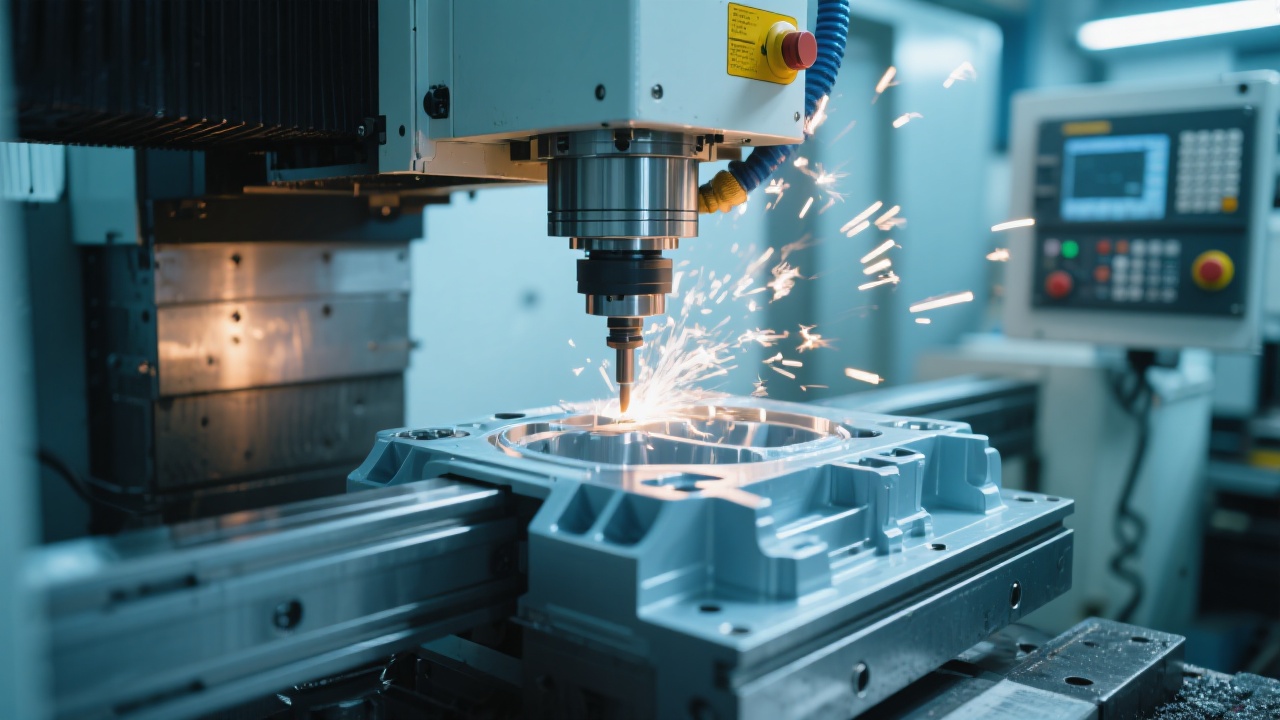
Selecting the right end mill is critical for both efficiency and finish. For common aluminum or mild steel projects in a home setting, carbide end mills with diameters between 2 and 6 mm (approximately 1/8" to 1/4") are versatile choices. Use a robust cut strategy: climb milling where feasible for a better surface finish, especially on flat pockets, and avoid prolonged cutting in a single pass that can overheat the tool. When replacing tools, ensure the tool shank seats fully in the collet and that the collet is tightened to the recommended torque. Always re-check the tool length offset after a change so the path remains accurate.
Keep a spare set of commonly used end mills and a small tool kit for quick changes. Document each tool’s parameters (diameter, flute count, working length) in a simple maintenance log so you can reproduce consistent results across jobs and shifts.

Always start with conservative feed and speed settings and monitor for unusual sounds, overheating, or deflection. Chip management matters too: collect chips to prevent recutting, which can degrade finish and cause thermal issues. If using coolant, ensure it’s compatible with the material and the machine’s enclosure. Regularly inspect belts, drive nuts, and linear guides for wear. A clean, well-lubricated path reduces chatter and prolongs the life of bearings and screws.
To support consistent outcomes, keep a simple setup sheet: stock dimensions, material, tool, spindle speed, feed rate, step-down, cutting time, and measured part dimensions after the run. This reinforces repeatability and helps you optimize cycles for future projects.
Daily: wipe down surfaces, remove chips from the work area, and inspect the spindle for buildup. Check for loose bolts on the bed, wasteboard, and clamps. Weekly: lubricate linear rails, ball screws, and lead screws as recommended in your DC6040A manual; verify alignment and squareness of X/Y/Z axes with a dial indicator or a precision square. Monthly: inspect drive belts for tension, test servo or stepper motor current settings if your system provides configurable options, and review the coolant or lubricant condition. If you notice decreased performance, begin a fault-diagnosis checklist: check limit switches, re-zero if necessary, and verify the machine’s firmware or controller settings.
In common scenarios, a run will pause due to a minor stall or overcurrent protection; re-home, re-zero, and run a dry test pass before resuming. If you experience repeated tool breakage or poor dimensional accuracy, re-check workholding, offsets, and tool wear. A systematic approach reduces downtime and helps you build confidence in the DC6040A’s capabilities.

Q: How do I ensure the DC6040A remains square after moving the table? A: Recheck X/Y/Z alignment using a dial or square after initial assembly and after heavy workpieces; perform a quick test cut to validate dimension accuracy before committing to final parts.
Q: What if the machine stalls during a cut? A: Stop, pause, inspect the tool and workholding, then re-zero and resume with reduced feed rate. This avoids tool breakage and helps you recover quickly.
Q: How can I improve surface finish on metal? A: Use smaller step-overs, finish passes with consistent speeds, and ensure the tool is sharp and properly secured. Keep the work area clean to avoid chips affecting finish.
Q: Is coolant necessary for all jobs? A: For aluminum and softer metals, minimal coolant or mist can help with chip evacuation; for harder steels, coolant is often beneficial to manage heat and surface quality. Always follow material-specific guidelines.
With the DC6040A, you’re building a practical path to precise, repeatable metal machining in a compact footprint. Kaibo CNC emphasizes a straightforward workflow that reduces learning curves while offering room to grow as your projects evolve. By focusing on core operations—setup, calibration, tool changes, safe operation, and routine maintenance—you’ll consistently achieve reliable results and higher-quality parts.
As you expand your capabilities, you’ll appreciate how the DC6040A scales with your needs: from simple engravings and pocketing to more complex contouring and small-batch production. This practical approach aligns with what hobbyists and small shops seek: a capable, dependable platform that helps you turn ideas into tangible parts with confidence.
Ready to elevate your precision manufacturing? Discover how Kaibo CNC DC6040A can streamline your home shop workflows and deliver consistent results across projects.


The page you're looking for dose not exist.
Let's get you back home.
It will jump automatically after 5 seconds!
Go Home


